Wednesday, December 5, 2007
Tuesday, November 13, 2007
Hot Sauce

My garden produces tons of hot peppers through out the summer. When it comes time to put everything to rest, I'm stuck with loads of hot peppers. This year I've decided to try and make my own hot sauce. I'm pleased with the results. since I've made way too much hot sauce, my friends and family will each get a bottle. The recipe I followed was one that I found out a Martha Stewart magazine. I did revise it some to suit my taste. If you like some of your dishes spiced up with hot sauce, and want to get adventurous, try making your own by following the recipe below.
Ingredients;
40 fresh Cayenne chilies, stemmed and halved
2 Habanero peppers, stemmed and halved
12 cloves of garlic
2 tsp sugar
4 tsp salt
8 cups white vinegar
Put all of the ingredients into a non reactive pan and bring to a boil. Reduce heat to simmer and cook covered for 20 minutes, stirring occasionally. Let cool slightly, then transfer everything to a blender and puree. After you've finished , pour the mixture through a fine sieve, over a small bowl. Discard the solids. When hot sauce is cooled completely, pour into small bottles, or an air tight container, and store in the refrigerator for up to 3 months.
This is a thin sauce with a strong Cayenne taste. It can be used to liven up foods such as pizza, chicken wings, sandwiches, and sauces.
Wednesday, November 7, 2007
Our South Beach Vacation
 Our Miami, South Beach vacation was fabulous. We all had a wonderful time. It rained a lot the first two days we were there, because of tropical storm Noel. We took our kids trick or treating at the shops on Lincoln Avenue. This street is supposed to be the place to be, if your in South Beach during Halloween. Needless to say, the kids received a ton of candy and they had a blast. I was enjoying all of the people and the very creative costumes many of them were wearing. I've never seen so many beautiful men and women walking around one area, in all of my life. Many of them looked as if they walked right out of a fashion magazine.
 The food was excellent. We just loved the Cuban cuisine. We chose to eat Cuban food often while we were there, accompanied by the delicious Mojitos, which seemed to go down quite easily.
One day we took a ride down to Key Largo. We snorkeled first, then hiked through the mangrove trails off the beach. It was a picture perfect day. Later that same day, we ate some conch fritters, which I absolutely love, at a cute fish shack not far from the beach.
One night me and my hubby decided to hire a babysitter. What a fun night we had. We started our evening off with a few Mojitos at the Delano, a very high end hotel that many celebrities stay at. I've displayed a photo of the Delano above. We then had a delicious meal at "A Fish Called Avalon" located on Ocean drive. After dinner we finished our evening off with a night cap at this fun club called "Mango's," which is also on Ocean drive. Even though the evening was very expensive, it was well worth it.
Now that I'm back in New york state, My daughter has caught a terrible cold, it's freezing here and very dreary outside. I'm just praying for a ray of sunshine to peak out of the clouds to brighten my mood. Since I've never been a fan of cold weather, days like today make me seriously think about moving down south.
Sunday, October 28, 2007
Miami Vacation

Photo by Frerk. Flickr
Tomorrow morning during the wee hours of dawn, me and my family are heading down to South Beach Miami. Even though I hate flying more than anything else in the world, I'm looking forward to the ocean, sun and sand. When I'm at the ocean, I make it a point to get up while the tide is very low, so I can collect all kinds of interesting shells, sea glass, driftwood and coral. I have a huge collection of shells and other sea treasures from my previous travels. Unfortunately, I won't have access to my blog while I'm away. Happy blogging to all and I'll be back next week.
Thursday, October 25, 2007
Tonight, The Brightest Full Moon Of The Year

Talcari

Photo by cwills. Flickr
Our dear friend from St. Lucia invited me and my husband over for some home cooked West Indian cuisine this past weekend. The meal he made us was absolutely incredible. One of the dishes he served for dinner was called "Talcari," which Is made with butternut squash. Talcari is served over basmati rice, or used as a dip with whole wheat pitta bread. We had it both ways and either way is delicious.
Our friend told us of an island tradition behind this butternut squash dish, the St. Lucian locals call "Talcari." He began by telling us, on the anniversary of a loved one's death, this meal is made for dinner, accompanied by sliced pita bread for dipping purposes. At midnight they go the deceased person's grave and place a plate of Talcari on top of the grave. After returning from the cemetery, the family gathers around to eat more Talcari and pita bread, as a way of honoring the soul of the deceased. I love to learn about different cultures and their customs, so I'm very happy he told us of this tradition. Another reason why I'm so thankful to him is, he gave me the recipe, so I could share it with those who may be interested in trying an exotic twist to butternut squash. He was kind enough to give me all the measurements. I decided to make this last night and it turned out perfect.
Our friend told us of an island tradition behind this butternut squash dish, the St. Lucian locals call "Talcari." He began by telling us, on the anniversary of a loved one's death, this meal is made for dinner, accompanied by sliced pita bread for dipping purposes. At midnight they go the deceased person's grave and place a plate of Talcari on top of the grave. After returning from the cemetery, the family gathers around to eat more Talcari and pita bread, as a way of honoring the soul of the deceased. I love to learn about different cultures and their customs, so I'm very happy he told us of this tradition. Another reason why I'm so thankful to him is, he gave me the recipe, so I could share it with those who may be interested in trying an exotic twist to butternut squash. He was kind enough to give me all the measurements. I decided to make this last night and it turned out perfect.
Ingredients;
1 large butternut squash, peeled and diced in small cubes
Olive Oil
1/4 cup scallions, chopped
5 cloves garlic, minced
1/4 tsp black pepper or more to taste
1 tsp salt or more to taste
1 1/2 tbs curry powder
1 tbs turmeric
1/2 cup of water
1 tbs cumin
In a large skillet, pour enough olive oil to cover the bottom of the pan. Heat oil over medium heat. After the oil is heated, add onions and scallions. Saute them for about ten minutes, or until they start to soften. Add the minced garlic to the pan and saute for an additional 5 minutes over medium heat, stirring often. Add the curry powder and turmeric to the pan. Keep stirring the spices into the vegetables, until you start smelling the aroma of the spices. Add the diced squash to everything and cover for 5 minutes, stirring occasionally. Take 1/2 cup of water and stir it into the squash. Continue to stir often while everything is cooking covering the pan afterwards. Once the squash starts to soften, stir in the cumin and start mashing it. Lower the heat to medium low and let simmer, covered. You'll continue to stir and mash often, until the squash is done. You may need to add more olive oil, salt and pepper, a few times while cooking, to adjust the taste. Talcari is best served over brown basmati rice, on top of whole wheat pita bread, or by itself.
Tuesday, October 23, 2007
Halloween Stew

Photo by Jacob L. Barr. Flickr
With Halloween just around the corner, it's fun serving a few festive meals to get everyone in the mood to celebrate, when this ghoulish holiday arrives. One recipe that's worth it's prep time, is Halloween stew. Not only is it fun to make, just think of all the antioxidants and vitamin packed nutrients your giving yourself while eating this delicious meal. I would like to share this recipe with you, because I know you won't be sorry you've made it, once you try it.
Ingredients:
4 small pumpkins, with insides cleaned out and their tops set aside
Olive oil
Salt and pepper to taste
1 Large Leek, chopped
2 medium cooking onions
6 medium cloves of garlic
3 medium carrots, chopped
2 medium parsnips, chopped
2 medium celery stalks, chopped
1 tbs dried basil
1 tbs sage
1 tbs Italian seasoning
2/3 cup crushed tomatoes
4 cups of vegetarian vegetable broth
2 bay leaves
1 can cannelloni beans (optional)
Romano cheese (optional)
Shredded mozzarella cheese (optional)
Preheat oven to 425 degrees. Clean out each pumpkin, removing the seeds. After they're clean, coat them with olive oil and set them on a baking sheet, sprayed with non stick cooking spray. Place their coated tops in front of them on the sheet. Put the baking sheet in the oven and set your timer for 15 minutes. When the 15 minutes are up remove the pumpkins form the oven and set them aside, until your ready to fill them. Meanwhile, set the stove to medium and pour some olive oil into the bottom of a sauce pan. Heat the oil, then add the chopped leeks and onions. Sprinkle with some salt and pepper and saute uncovered for about 10 minutes. When the onions and leeks have softened, add the chopped garlic, carrots, parsnips, celery, and all the spices to the pan, except for the bay leaves. Continue to saute uncovered over medium heat for 20 minutes, stirring often. You may need to add more olive oil along with more salt and pepper to the vegetables. When the vegetables start to become tender, add 4 cups of vegetable stock, 2/3 cups of crushed tomatoes and bay leaves to the mixture. You may also add more salt and pepper to taste if desired. Bring the stew to a boil, then reduce to medium heat and let simmer, uncovered for 25 minutes. When the time is up, remove the pan from the stove and stir in a can of beans if desired. Salt and pepper the insides of each pumpkin and fill the cavity with stew. When they're all full, sprinkle the tops with Romano cheese and pop them in the oven uncovered for 45 minutes, on the middle rack of the oven.
When everything is done, remove the pan from the oven and carefully place each pumpkin into a serving bowl. Sprinkle each pumpkin with mozzarella cheese, then carefully place their cooked tops on them and serve. For some fun ideas on how to decorate the table you'll be serving this witches brew on, try placing a lit jack-o-lantern in the middle of the table, with additional Halloween voltives lit around the room you'll be dining in. This would be a great way to get most people into the spirit of Halloween.
Thursday, October 18, 2007
Scalloped Potatoes Italian Style
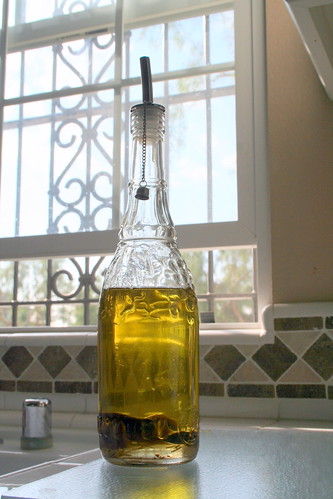
Photo by Frogmiller. Flickr
On those dark and chilly evenings, when I'm standing in my kitchen deciding what to make for dinner, my mother's scalloped potatoes come to mind. I've always associated potatoes as being a comfort food, because while I was growing up, my mom made them as a side dish to go along with many different entrees during the colder months. In the winter time, she use to wrap potatoes up in tin foil and bake them in our wood burning fireplace. Unfortunately, I can't follow her tradition for baked potatoes cooked in the fireplace at my house, because our fireplace is gas. Most of the time she baked scalloped potatoes with olive oil. I missed it so much after she passed away, that I just had to try and master this dish myself. Well, I believe I've done it. At least my husband says I have. To my happiness and surprise, he was shocked at how I had nailed her potatoes right to a tee. Surely, My motivation was, if I couldn't make them just as she did, I would never be able to savor the fabulous flavors of this dish anymore. Anyway, here's the recipe for this awesome potato dish, Enjoy!
Ingredients;
7 medium white potatoes, washed, peeled and sliced thinly
1 large yellow onion, thinly sliced
2 medium plum tomatoes, thinly sliced
4 large cloves garlic, minced
1/3 cup olive oil
2 Tbs fresh sage
2 Tbs fresh parsley
1/2 Tbs dried rosemary
salt and pepper to taste
1/4 cup of Romano cheese (optional)
Pre heat oven to 425 degrees. Place all the ingredients in a large baking dish. Mix everything together well, cover and Place the dish into the oven on the middle baking rack. Bake covered for 30 minutes. When 30 minutes are up, remove the cover and bake uncovered for an additional 15 to 20 minutes. There is no need to stir this while it's cooking. When the potatoes are finished remove them from the oven and serve them with your favorite entree. For you carnivores, these potatoes go nicely along side of grilled steak or roasted chicken dishes. For us vegetarians, I enjoy eating these potatoes along side a nice hearty bowl of lentil soup, or vegetable minestrone, scooped over some 2 day old Italian bread.
Wednesday, October 17, 2007
Abstract Oil Painting
 This is an oil painting I did back in 1998, when I was 33 years old and had much more time to paint. The name of this abstract is called "My Life." At the time of this composition, I felt a need to try and describe my life experiences up until that time. This is how I came up with the name and the images in this painting. Maybe in the future, I'll do an updated abstract of my life experiences up until now. Surely it will be much more cluttered than this painting.
Tuesday, October 16, 2007
A Moonlit Ride
 This is a painting I completed in the beginning of the month. October always inspires me to create witches, pumpkins, and black cats, every time I decide to pick up my paintbrush, or charcoals. It took me about three days to complete this watercolor. I'm hoping I can squeeze in a couple more black cat and witch paintings or drawings, before Halloween arrives.
Monday, October 15, 2007
Sauteed Apples With Cinnamon

Photo by Rmrayner. Flickr
Apple season is now in full swing in my part of the world. Researchers say that an apple a day truly does keep the doctor away. Studies have shown that by consuming apples on a regular basis, we can protect ourselves from cancer and diabetes. Apples are also believed to promote lung and cardiovascular health, because they contain a good amount of fiber (most of it comes from the peel) and vitamin C.
There's many apple recipes to choose from. One of my favorites are sauteed apples. Sauteed apples make a nice dessert during the autumn months, when they're the tastiest. For this recipe you can choose any type of apples you desire. Can you believe there's 7,500 varieties world wide? Wow! Now that's a lot of apples.
Ingredients;
4 medium apples, sliced and unpeeled
2 tbs freshly squeezed lemon juice
2 tbs butter
2 tbs honey
1/2 tsp vanilla extract
4 whole cinnamon sticks
1/4 tsp ground nutmeg
1 scoop of vanilla frozen yogurt (optional)
In a medium bowl, toss the apple slices with lemon juice and set aside. In a skillet melt the butter over medium heat. Stir in the vanilla and honey. Add the apple slices to the pan and stir well. Sprinkle apples with nutmeg and place the cinnamon sticks in the pan. Cover and heat for an additional 5 to 8 minutes, while stirring a few times in between. When your apples are done, serve them on four small plates, next to a scoop of vanilla frozen yogurt if desired. Finish each plate off with one cinnamon stick for a pretty presentation.
Friday, October 12, 2007
Roasted Pumpkin Seeds

Pumpkin seeds are a great autumn snack. Not only are they packed with vitamins B and E, they are also very high in Zinc. Pumpkin seeds have a balanced source of good proteins, making them a good choice for vegans to choose as a snack or an additional topping on their salads. If I haven't convinced you to try these tasty little seeds yet, then I must inform you that in some countries pumpkin seeds are know to be an aphrodisiac. Now that that's said, I strongly encourage you to get yourself to a grocery store, or local farm stand, so you can pick up a pumpkin of any size and start reaping the rewards that this brightly colored autumn squash has to offer you.
By following these very easy roasting instruction you will have a tasty little snack in no time. Pre heat your oven to 400. Cut the top of a pumpkin and clean out the insides. Collect all the seeds you've removed and rinse the pulp off of them in a colander. Reserve the meat of the pumpkin for later use. After you have rinsed the seeds, dry them well with paper towels. Place the dried seeds on a flat baking sheet, then sprinkle with olive oil and sea salt. Mix everything together well before popping them into the oven. While they're baking, you will need to stir them around often to prevent them from burning. Remove your seeds from the oven after ten minutes or until they are nicely browned. Letting them cool for 15 minutes on the baking sheet before transferring them to another container, will make them crispier. After removing them from the pan, store them in an airtight container.
Many times I've placed small dishes of pumpkin seeds on the tables where my guests would be socializing . By doing this, I've found many people actually enjoyed picking at them while chatting away.
Wednesday, October 10, 2007
Tessa My Persian Cat

Last Sunday morning my daughter's girlfriend's mom and her older daughter were kind enough to snap a photo of my Persian Cat Tessa and send it to me later. This old cat will be the big 15 next April. She's a silver Persian and she has out lived her companion Patrick, my other silver Persian and two children. She's a real trooper. She's proves that she's still healthy and very active by leaving half eaten moles on my porch every other day. Tessa also takes no bull from my 2 year old, 110 lb Rottweiler. Our dog respects her and knows who's boss around here.
Friday, September 28, 2007
Roasted Red Peppers
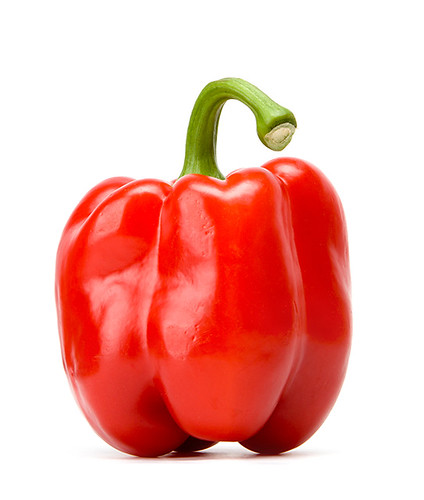
Photo by Shadphotos. Flickr
Both red and green peppers are high in vitamin C, making them one of the prize winners, of aiding in one's good health if added to our diets. My mother use to have a large bowl of roasted red peppers in our refrigerator at all times. Our family used her well loved peppers in sandwiches, mixed in salads or eaten as a side dish. Sometimes she used them as a topping over her delicious homemade pizza. Even though red peppers can be a bit expensive to purchase, You'll feel they were worth adding to your grocery list after tasting this rustic Italian vegetable recipe.
Ingredients;
6 large sweet red bell peppers, left whole
Extra virgin olive oil
1 large clove of minced garlic
Salt and pepper to taste
1 tsp chopped fresh parsley
Lower your oven rack to the middle of your oven. Put your oven on broil. Place the whole red peppers onto a baking sheet that's been sprayed with no stick cooking spray. Put the pan in the oven, keeping the oven door cracked opened. As the peppers are roasting, you will need to turn them often to prevent them from burning. Meanwhile, mince your garlic and chop the parsley. Once the peppers are very soft and and their skins are charred (not completely burned,) remove them from the oven and allow them to cool.
When the peppers have cooled, carefully peel their skins off, discard the stem and remove most of the seeds. Slice them length wise. After you are done thinly slicing each pepper, place them in a bowl. Add the extra virgin olive oil, salt and pepper, minced garlic, and chopped parsley to the bowl. Stir everything together well. You can serve them immediately, or store them in the refrigerator for future use. Roasted red peppers will keep nicely for about a week. If you're going to use them as a side dish, remove them from the refrigerator about 20 minutes before serving them. When they're eaten as a side dish, they taste better at room temperature. For all other uses, they can be eaten chilled if you desire.
Wednesday, September 26, 2007
Whole Wheat Pita Bread Pizza

Photo by Andrew Scott. Flickr
There's often times when I'm too busy to make a huge meal, so whole wheat pita pizza is a healthy and easy alternative, rather than taking the time to make a pizza from scratch. One Huge advantage to making this type pizza as an appetizer for your guests, is everyone will like it. I have yet to meet someone who dislikes pizza. This is an easy to make side dish, appetizer or main meal, which is also absolutely mouth watering. This dish will only take about 5 minutes to put together and an additional ten minutes to bake.
Ingredients;
4 slices of purchased whole wheat pita bread (which ever size you prefer)
Extra virgin olive oil
3 cloves of minced garlic
1 to 2 thinly sliced tomatoes
1 tbsp chopped fresh basil
1 1/2 tsp chopped fresh oregano
salt and pepper to taste
Parmesan cheese
A dash of crushed red pepper (optional)
Mozzarella cheese
Pre heat oven to 375. Spray a large baking sheet with non stick cooking spray. Place your pita bread onto the sheet in a single layer. Start by adding the olive oil to each slice, while at the same time spreading it around with a spoon. After you've finished spreading the olive oil on your pizzas, sprinkle the minced garlic evenly over the top of them. Add your sliced tomatoes onto each piece in a single layer. Drizzle a bit more olive oil over the pizzas, then add the fresh basil, oregano, salt and pepper to taste, parmesan cheese and crushed pepper if desired. Place them in the oven for eight minutes. After eight minutes are up, remove the sheet and sprinkle grated mozzarella cheese over the top of them. Place them back in the oven for an additional two minutes. When they are done, remove them from the oven and let them sit for five minutes before serving. You can either serve them whole or cut into slices.
Saturday, September 22, 2007
Homemade Whole Wheat Vegetable Pizza

Photo by Gym. Flickr
Most of us are all aware that Whole grain products are much healthier for us to consume, than foods containing white enriched flour. Baking with whole grain flour is no more difficult, than baking with enriched flour. Pizza is especially healthy and tasty made with wheat flour. It gives a whole new twist to the taste of pizza. Even though I'll be listing the toppings I like to put on my pizza in the recipe below, you can improvise and add your own favorite toppings.
Ingredients for your dough;
1 1/2 cups of warm water
2 tbsp sugar
1 envelope yeast
2 tbsp olive oil
1 1/2 tsp salt
4 cups of whole wheat flour ( you can do 2 cups of wheat flour and 2 cups of white flour, instead of the 4 cups of wheat flour if you prefer.)
Toppings;
Olive Oil
6 cloves of minced garlic
1 thinly sliced large tomato
1 thinly sliced onion
1 cup sliced baby bella mushrooms
Parmesan cheese
2 tbsp fresh chopped basil
1 tbsp fresh oregano
Salt and pepper to taste
Crushed red pepper (optional)
Pour the warm water in a large bowl. Stir in the sugar until it's dissolved. Add one packet of yeast and let it set for 15 minutes. When the 15 minutes are up, add the olive oil and salt. Stir it all together. Start adding your flour, 1 cup at a time, stirring in between cups. A wire whisk is ideal to start out with. When the dough starts to thicken, switch to a large spoon, until you can start using your hands. Once all four cups of flour have been added, you should be able to start kneading your dough. You'll need to keep adding small amounts of flour to the dough and the surface your working on, while you are kneading. It's very simple to knead dough. All you have to do is keep folding your dough in half, while placing pressure on it for 8 to 10 minutes, or until the dough no longer sticks to your hands and your able to form a ball with it. Once you've formed a ball and your done kneading, lightly grease the ball with olive oil. Grease a large bowl with olive oil and place the dough in the bowl. Cover with a cloth that's large enough to cover the top of the bowl and set the bowl aside away from any drafts. Rising time is usually 1 1/2 to 2 hours.
When the dough has risen, preheat your oven to 425 and cut the ball into equal halves. This recipe will make two medium pizzas, so you'll need to go and gather two pizza pans. Grease and flour both pans, then slowly and carefully, spread each half onto the pans. The dough should be spread evenly, covering the whole width and length of each pan. Once you've formed your pizzas, place them in the oven for five minutes. Remove them from the oven after the five minutes are up and add all of the toppings. Start by spreading the olive oil over each pizza with a spoon. Generously sprinkle the minced garlic evenly over both. Continue placing the thinly sliced tomatoes, sliced onions, bella mushrooms, basil, salt and pepper, oregano, parmesan cheese and crushed red pepper if desired, on your pizzas. Place the pans back in the oven, turning every five minutes, for another twenty to twenty five minutes, or until the bottom of the pizzas are a golden brown. Five minutes before removing the pizzas from the oven, sprinkle mozzarella cheese over top of both and let the cheese melt. Remove them from the oven. It's best to let pizza set for 10 minutes before cutting and serving it.
Thursday, September 20, 2007
Sauteed Sweet Banana Peppers

Photo by Flippers09. Flickr
This summer was the first time I've ever planted banana peppers and needless to say, I was very impressed with their performance in my garden. My plants produced so many of these taste light green peppers, that I started to saute them almost daily. If your a big fan of sweet banana peppers like I am, then you should try the recipe I've listed below. It's quick to put together and it doesn't require a lot of ingredients. In this recipe I prefer to saute the peppers whole.
Ingredients;
Sweet banana peppers
Extra virgin olive oil
2 large garlic cloves
Salt and pepper to taste
In a large frying pan, pour enough olive oil to cover the bottom of the pan and heat the oil over medium heat. After the oil is heated add the sweet peppers whole and saute them over medium heat. Half way through the cooking process, add the chopped garlic cloves. After the peppers are soft and able to Peirce easily with a fork, add some salt and pepper to taste and they're ready to serve. You can use sauteed sweet banana peppers in salads, sandwiches or as a side dish with any main dish.
Wednesday, September 19, 2007
Iris

There's a game called tag being played right now. I have just been tagged by Olivia, so I've decided to play the game. The object of the game is to choose some people you would like to tag. After you have notified them to let them know you've tagged them, they will need to use each letter out of their middle names to describe themselves. If you don't have a middle name like me, then you can choose a name you like and do the same thing. The name I'm going to use is Iris, because I've always loved the name and I was thinking about naming my daughter Iris just before she was born. Here goes with my answers.
Iris;
I- Intuition- Being intuitive about different situations taking place in a person's life, is quite an advantage for someone to have. Working on developing my own intuition is a major part of my life. Meditation is a very good technique to practice for sharpening one's intuition. I find meditating outdoors in nature, is one of the best ways to get in touch with my own inner being, while getting in tune with the universe at the same time. Meditating outdoors when I can, helps to keep me balanced, thus helping me to tap into my intuition more often.
R- Resilient- It's so important for me to be able to bounce back from any negative situation that takes place in my life whether it be physically, emotionally , mentally, or spiritually. If possible I will try to bounce back from negative situations by exercising, eating healthy, keeping my thoughts positive, meditation and prayer, spending a lot of time outdoors and keeping a journal.
I- Introvert- Being shy and trying to keep myself quiet and unnoticeable when I'm around a crowd of people, I think I can label myself as being an introvert. Some of my best times are spent by myself or with my hubby. I prefer to keep my life quiet, with only a few close people around me.
S- Sensitive- I find myself to be a very sensitive person. My feelings get hurt very easily. Many sad, or hurtful events and situations happening around me, are able to touch my heart and soul at a deep level. I really feel for others who are going through a tough time in life. When my friends need to talk to me about things they are sad or hurt about, I will try my best to stop what ever it is I'm doing, so they can have my undivided attention and can talk to me about their troubles .
Friday, September 14, 2007
Spiced Pumpkin

Photo by Rasiel. Flickr
This recipe is a complete creation of my own. Since I absolutely love both east and west Indian cuisine, I decided to use some Indian spices while making this dish. The best way to make this recipe is by tasting and adding your ingredients through out the cooking process. Therefore, I will not be including measurements.
Ingredients;
1 small to medium pumpkin, pulp and seeds removed
Olive oil
1/3 cup of water
Cinnamon
Saffron
Turmeric
Curry
Ground coriander
5 cloves of crushed garlic
Salt and pepper to taste
Shaved coconut (optional)
Raisins (optional)
Wash and clean out your pumpkin as you would a jack-o-lantern.Take out your handy dandy cutting board and carefully start cutting the pumpkin into cubes with a very sharp knife. Please be careful not to cut yourself while doing this, the flesh is very solid. After you've cut everything into cubes, take the cubes and carefully slice the skins off of each cube. Place the pumpkin in a large frying pan, with a good amount of olive oil covering the bottom of the pan. Put your stove on medium high, add 1/3 cup of water to the pan and cover. Stir often, scraping the bottom of the pan to prevent burning and sticking. As the pumpkin starts to soften add the cinnamon, saffron, turmeric, curry and ground coriander to the pan. Stir everything together well and reduce your heat to medium. If you have a mortar and pestle, use it to crush your garlic and add it to the mixture along with more olive oil and some salt and pepper. If you are going to use coconut shavings in your recipe, now would be a good time to add them. Through out this whole process, you will continue to add olive oil and spices to the pumpkin, until your taste buds are satisfied. Keep stirring frequently as the pumpkin continues to cook down. While it's cooking down, you can start to mashing everything slowly. When your pumpkin is very soft and has the consistency of mashed potatoes, you can stir in raisins the last five minutes before removing the pan from the stove. Once removed from the stove, transfer to a bowl and serve. Spiced pumpkin makes a great side dish or it can be served as a main dish with brown basmati rice.
Baked Pumpkin
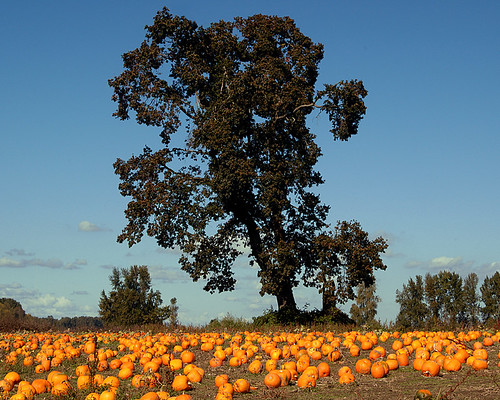
Photo by MesmanImages. Flickr
Pumpkins which belong to the squash family, become a huge hit during the autumn months. Many of us purchase these large bright orange vegetables for decorating purposes only. What we fail to realize is, that these Halloween favorites are loaded with disease fighting anti oxidants, making them very beneficial to us, if we add them to our diets.
This tasty pumpkin recipes I would like to share with you, is very simple. I make it all the time, while pumpkins are in season. You will need to pick out a small to medium sized pumpkin that's deep in color and firm to the touch. When cooking smaller pumpkins, they tend to be tastier and not as watery as the larger ones.
This tasty pumpkin recipes I would like to share with you, is very simple. I make it all the time, while pumpkins are in season. You will need to pick out a small to medium sized pumpkin that's deep in color and firm to the touch. When cooking smaller pumpkins, they tend to be tastier and not as watery as the larger ones.
Ingredients;
1 small to medium size pumpkin, pulp and seeds removed
1 tsp Cinnamon
1 tsp all spice
1/4 cup of brown sugar
1/3 of a stick of butter or margarine
Salt and pepper to taste
Pre heat your oven to 400. Wash and cut the top off of the pumpkin. Remove the pulp and seeds, reserving the seeds for roasting if desired. Place the top back on the pumpkin and wrap it well with foil. Put the pumpkin in a baking dish and place it in the oven. Baking time will be about an hour or more depending on the size of your pumpkin. Remove from the oven when your pumpkin is soft to the touch. Let it cool for about 20 minutes. Once cooled remove the foil and start scooping the flesh out of the pumpkin. Put the flesh in a large bowl. Add the rest of the ingredients to your bowl and mash everything together well. This side dish pairs nicely with many entrees.
.
Wednesday, September 12, 2007
Interview
 Olivia, who is a well known German author, sent me some questions that I would be happy to answer for her. I will list the five questions, then after each question I will write my answer.
1) What was the most joyful event in your life?
Answer: The most joyful event in my life was the day the lord blessed me with my two beautiful children. They mean the world to me and this was the most welcoming, joyful, and life changing experience in both mine and my husband's life. It's amazing how two people can share something so wonderful, such as the birth of their child and having the honors of raising them, as well as getting to know the new little soul that enters their lives.
2) If you could be a plant which one would you be and why?
Answer: If I could be a plant, I would choose to be a rose bush. The reason is, because rose bushes are so striking and beautiful to look at, but you must be careful not to get pricked by their thorns. It almost makes me think these plants can keep some people at bay by their painful thorns and therefore those who decide to pick off of the rosebush must do it carefully.
3) If you could be an animal which one would you be and why?
Answer: Even though Butterflies are my favorite, I wouldn't choose to be one, because these dainty little beauties have to contend with way too many predators. I would choose to be my second favorite animal, which is a tiger. Tigers are so colorful, mysterious, beautiful and powerful. They travel, hunt and live in solitaire, not in packs such as the lion does, which makes them the true kings of the jungle in my book.
4) What is the most important lesson you want to teach your children to prepare them for life?
Answer: We now live in a time where our world is full of ugliness and evil. It's impossible to keep my children sheltered from it, because by doing so I would also be sheltering them from the goodness and innocence that still exists. It's extremely important for me to teach my children how to make their life decisions, carefully and wisely. I want them to treat others the way they themselves would expect to be treated and to know that the unconditional love and understanding they radiate out to others, including other creatures and the earth itself is a priceless gift to give. It's not only important to respect your fellow human beings, but it's just as important to respect the other living things around you such as, every living creature, plants and our environment.
5) What do you see in art, why have you become an artist?
Answer: When I look at the art of others, I admire the uniqueness from one piece to the next. I hate to say that someones work is better than another. This is simply untrue. Everyone possesses a uniqueness within them and they express it in different ways. I admire the differences and see their inner beauty within their work. You can really see a part of the artist in their composition, if you study it. This may sound a bit odd, but I've never thought of myself as an artist. I've always loved to draw, paint, and create what ever I could. About 10 years ago, I was out in my back yard searching for some clay because we had clay soil. I gathered up a bunch of it and made a pretty sunflower out of the hunk of dirty clay I found.
Tuesday, September 11, 2007
Abstract Of A Tree Trunk
 This is a composition I did back in the summer of 1997. It's an abstract charcoal drawing of a tree trunk. Don't ask me what inspired me to create this piece, because I simply don't know. One hot summer afternoon I was lounging around in the backyard of our first home. I was admiring the shapes and designs from the tree trunks of my basswood trees, that were towering over my back lawn. A half hour later I had this itch to go inside, grab my pastels and some paper, so I could see what I would be able to come up with from the shapes on the tree trunks I had been studying. This picture was the end result. Everyone who views it, sees something different within my drawing. Oddly enough my husband sees me. To this day, I myself still don't know what I see in it.
 Friday, September 7, 2007
Steamed Green Beans and Olive Oil

Photo by What Rhymes With Nicole. Flickr
If your a fan of fresh green beans like I am, then you will love this easy to make recipe I have listed below. If you don't grow your own green beans, you can simply go to your local grocery store to purchase them the same day you plan on whipping this dish up. For those of you who lucky enough to have green beans in their gardens, I recommend harvesting them the day you decide your going to make them, because the fresher the beans, the better this recipe will taste.
Ingredients;
A large bunch of fresh green beans, stems removed
2 cloves of minced garlic
1 tbsp parsley
Salt and pepper to taste
1 tbsp red wine vinegar
3 Tbsp extra virgin olive oil
Place your washed and stemmed Green beans in a large steamer. Cover the pan and steam your beans for about 15 minutes or till they are tender, but still have some firmness to them. Once they are cooked, place them in a large bowl. Add the minced garlic, parsley, salt and pepper to taste, red wine vinegar and extra virgin olive oil. Toss everything together and serve. If you want to save time, you can make this Dish a few hours before your going to eat and serve it at room temperature. Whether you serve the beans warm or at room temperature, they're just as delicious both ways. This recipe goes well as a side with Grilled meats and vegetables, Paired with a nice Pinot Noir.
Wednesday, September 5, 2007
Italian Stuffed Eggplant

Photo by Morgan Irene. Flickr
Even though summer's coming to an end, my garden is still continuing to produce an abundance of large purple and white eggplant. As the days begin to shorten and the evenings become crisper, our bodies start to crave heartier meals. Serving this recipe up as a main dish for either your family or dinner guests, will most definitely satisfy this craving.
Ingredients;
Cooking Spray
Flour
4 large beaten eggs
Italian style bread crumbs
2/3 cups parmesan cheese
Salt and pepper
2 medium eggplants, sliced lengthwise about 1/3 inch thick
3 cups of shredded mozzarella cheese
1/3 cups of ricotta cheese
1 cup of chopped fresh basil
4 or more cups of marinara sauce, either purchased or homemade
Preheat oven to 350. Spray some baking sheets with cooking spray. Place your flour in one bowl, the beaten eggs in another bowl and your bread crumbs in the last bowl, mixed with about 1/2 cup of parmesan cheese. Cut the eggplant in slices and sprinkle with salt and pepper, then coat each slice with flour, egg and bread crumbs. As you finish with each piece, place them in a single layer on the baking sheet. When your sheets are full, place them in your oven and turn after 15 minutes. Total cooking time should take 30 minutes or til they are golden. After the eggplant is done, remove them from the oven and let them cool completely while they are still on the sheets.
Mix ricotta cheese, mozzarella cheese, 1 cup of parmesan cheese and basil in a bowl. Sprinkle salt and pepper to taste, then mix it all together. Take an eggplant slice and spread an even layer of cheese mixture on top of the slice, then roll eggplant starting at the small end, til the filling is completely enclosed and a roll is formed. Continue this procedure til all your slices are filled.
After you are done making all your rolls, take a large baking dish and fill the bottom of the dish with sauce. Place the rolls in the dish. After the dish is full, pour some sauce over the top of the rolls. Sprinkle parmesan cheese and mozzarella over the top, then place the dish in the oven uncovered. Bake at 350 for about 30 minutes or til heated through.
Friday, August 31, 2007
Drying And Freezing Fresh Basil
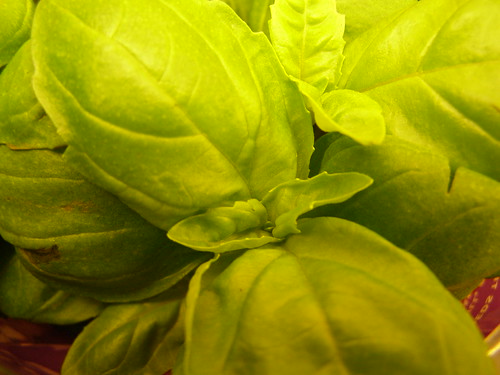
Photo By Papa Razzi1. Flickr
Basil is often used in many of my home cooked meals. This is one herb I would be lost without. Planting an abundance of fresh sweet basil is one of my top priorities while preparing my vegetable garden in the spring. You can use this herb liberally in many recipes, especially in pesto sauces and tomato based dishes. There are a few ways to keep a large supply of basil readily at hand, as the summer fades and as fall begins to roll in. The two methods I've used have been drying and freezing. Either method preserves my basil quite nicely.
Drying Basil is very simple. The first and most common way to dry basil is by harvesting the leaves or sprigs on a sunny morning, when the flavor is at it's peak and it's oil contents is high. Wash your basil if necessary and pat the leaves dry. Tie sprigs together by the bunch and hang them in a dry place away from the light. You can also dry the leaves on a cloth spread over a baking sheet. It will take three weeks for the basil to be completely dried.
For the last four years I've been drying my basil in the microwave. Call me impatient, because I just can't stand waiting out those three weeks. By using a microwave, I have my herbs dried and stored in one day. All you will need to do is follow the first few steps on harvesting. Instead of tying the sprigs together, you would want to gather up a paper towel or paper plate and a microwave safe bowl filled with water. Pull the leaves off of the sprigs and place them on either your paper towel or plate. Place both the basil and the bowl full of water in the microwave. Set your microwave on high for three minutes, If the Herbs look dry, remove them. If they still seem damp, continue to microwave for two additional minutes, then at one minute intervals till they are completely dried and ready to store.
After you are done with the drying process, you should store herbs in clear glass jars away from the light. Mason jars work quite well for storing dried Basil. My personal preference are the larger mason jars, because I can fit more of the herb in the jar, therefore I will have less jars stored in my already crammed spice cabinet.
Last but not least, the fastest and easiest way to store basil is by freezing it. This can be done in a jiffy. Wash and dry the herbs you've collected. Place a bunch of the leaves in a freezer bag. Seal The bag tightly, making sure there is no air caught in the bag. Place the bag in your freezer and your done. When it comes time to use your already frozen basil, you simply take one of the bags out of the freezer. You then break off the amount of basil you will need for that moment and reseal the bag after taking what you need. Place any remaining herbs back in the freezer for future use. It is not necessary to thaw the basil first, just add the desired amount to any of your favorite recipes while it's still frozen frozen.
Any of these storing methods you choose to use, will not only save you of money, but will save you the time of having to run out to the store, on a bone chilling, blustery, winter day, because you ran out of basil and absolutely need it for a recipe your whipping up for dinner guests later that evening.
Tuesday, August 28, 2007
Halloween Witch Drawing
 October is one of my favorite months. My birthday falls in this month and so does my favorite holiday, Halloween. Autumn is so pretty as the leaves from the trees are turning all different Hughes of red, orange, brown and yellow. During the month of October, the weather is still warm enough to enjoy the outdoors and admire all of the wonderful changes occurring in nature. There's nothing better than eating a baked butternut squash, or some spiced pumpkin along side of some hearty vegetable stew, accompanied by a tall glass of fresh apple cider from the local apple store on those crisp Autumn evenings, as the days begin to shorten.
 October has one of the prettiest full moons out of the whole year, which is called the Harvest Moon. It's been said that farmers use to harvest their crops late into the evening during the Harvest Moon, because the moon was very bright during this time, which made it easier for them to pick their crops well after dark.
Visiting the pumpkin patch to pick out our jack-o-lanterns is a very exciting day for our whole family. We like to make a whole day out of it by going on a hayride, getting our pumpkins, drinking hot mulled apple cider afterwards, picking up winter squash, gourds and apples that same day, then later returning home for a tasty autumn meal.
There are many costumes for children to choose from on Halloween. My daughter has a very hard time deciding what she wants to be. It's so fun getting my children ready to go out trick or treating. Just walking around and seeing everyone in their costumes, running from different houses to see who can get the most candy makes for a great evening. The drawing displayed above is a charcoal I did a month ago. It's called "The Halloween Witch." Hopefully, I will get time to finish two more charcoals I have in mind, so I can complete my "Halloween Witch" series.
Saturday, August 25, 2007
Celestial Oil Painting
Here is an oil painting I did back in 1999. During this time period I was on a celestial  kick, so this is what inspired me to create this painting. Even though they are very messy to work with, oil paints are my number one choice of media to work with, out of any other type of media. They go on so smooth and they are easy to rework when you decide you want to change your composition. The colors you can get from using oils can be quite stunning. I do intend on creating some of my butterfly knowledge cards, by using Oil paints for some of my compositions.
Hopefully, I'll be able to find more time to paint during the fall, once my daughter is back in school and my son begins preschool. For now I'm preoccupied harvesting the vegetables and herbs out of my garden and storing them all for the winter months ahead.
 kick, so this is what inspired me to create this painting. Even though they are very messy to work with, oil paints are my number one choice of media to work with, out of any other type of media. They go on so smooth and they are easy to rework when you decide you want to change your composition. The colors you can get from using oils can be quite stunning. I do intend on creating some of my butterfly knowledge cards, by using Oil paints for some of my compositions.
Hopefully, I'll be able to find more time to paint during the fall, once my daughter is back in school and my son begins preschool. For now I'm preoccupied harvesting the vegetables and herbs out of my garden and storing them all for the winter months ahead.
My Sunflowers
My sunflowers are in full bloom and they're absolutely beautiful. My husband took the photo displayed on this post from my garden yesterday. It's very important for the other plants in your garden to get pollinated by bees, therefore sunflowers are an ideal choice for this purpose.  Bees as well as butterflies swarm around the large yellow flower heads of these plants all day long during the summer months. What a blessing it is for me, to sit and watch nature, with all it's wonders at work, while at the same time reaping the benefits of my garden, along with the healthy meals that come from it.
My sunflowers are planted directly behind my Italian pole beans. I use their large stalks for my beans to vine up. Practicing this method saves me time and money. When planting time rolls around, I plant one row of Italian pole beans, then with the next row close behind, I plant sunflowers until I end up with at least eight altrinating rows.
It's pretty interesting to look at once they are both grown and coexisting happily together through out the summer season. It's also pretty neat walking inbetween the rows of towering mammoths, so I can collect all of the huge beans hanging off of their stalks.
 Bees as well as butterflies swarm around the large yellow flower heads of these plants all day long during the summer months. What a blessing it is for me, to sit and watch nature, with all it's wonders at work, while at the same time reaping the benefits of my garden, along with the healthy meals that come from it.
 My sunflowers are planted directly behind my Italian pole beans. I use their large stalks for my beans to vine up. Practicing this method saves me time and money. When planting time rolls around, I plant one row of Italian pole beans, then with the next row close behind, I plant sunflowers until I end up with at least eight altrinating rows.
It's pretty interesting to look at once they are both grown and coexisting happily together through out the summer season. It's also pretty neat walking inbetween the rows of towering mammoths, so I can collect all of the huge beans hanging off of their stalks.
Tuesday, August 21, 2007
West Indian Eggplant And Rice

Photo by Heaven's Gate (John). Flickr
My husband's friend who is a native of St Lucia, located in the Caribbean, cooks up the best West Indian Cuisine I've ever had. On a few occasions, he's come to our home and prepared a few delicious meals from his homeland for all of us to savor and enjoy. One of my favorite dishes is his eggplant over rice. The last time he was over visiting, I watched him make this for us. Since I've been harvesting my eggplant daily, I figured this would be a great time for me to try and make this Caribbean vegetable recipe myself. Obviously, I had to call him once while I was whipping it up, to ask him if I had added all of the accurate spices needed to flavor the eggplant. To my surprise my meal turned out fabulous and both my husband Paul and I, were very happy with the outcome of our West Indian dinner. If you are going to try making this yourself, You will have to figure in the amount of each ingredient by tasting it, rather than measuring everything out with measuring spoons.
Ingredient;
8 medium eggplant chopped and set aside
Olive oil (enough to cover bottom of a sauce pan and more for adding later)
5 large cloves of chopped garlic
2 large white onions, chopped
Cumin
Coriander
Curry powder
Whole Cloves
Turmerac
Saffron
Abodo
Your favorite hot sauce
Salt and pepper to taste
Basmati rice
salt
4 chopped cloves of garlic
1/4 cup of chopped cilantro
black pepper
Wash and chop your eggplant, then set them aside. In a medium or large sauce pan, cover the bottom of the pan with oil. Set your stove to medium high.Heat the oil and add all of the spices to the oil . Keep stirring the oil for about 3 minutes. Add the chopped garlic and onion to the oil and saute for an additional 5 to ten minutes . Avoid burning the garlic. Take your eggplant along with the hot sauce and add everything together. Do not cover your pan. You will need to stir this all in well. At this point you may want to add more olive oil to coat your eggplant. Once your eggplant starts to soften, you will begin mashing it often as it continues to cook. This is the time you should lower your heat to medium, then eventually to medium low. You may want to taste everything at to see if the spices need to be adjusted. You can also add more oil if it seems dry. Continue to cook the eggplant till it is the consistency of paste. This may take up to 45 minutes. The key is to keep stirring and mashing often the whole time it's cooking. You will also want to stir in any browning that you are scraping from the bottom of your pan as you are cooking.
While waiting for the eggplant finish you can prepare the rice by following the directions on the back of the package. When the rice is complete, you can add your chopped garlic, chopped cilantro and salt to taste. Stir it all together well and serve the eggplant over top of your rice.
Friday, August 17, 2007
Freezing Tomatoes For Winter

Photo by 1Bluecanoe. Flickr
During harvesting season I am always gathering up my vine ripened tomatoes, so I can get them ready to freeze for the winter. This method of preserving fresh tomatoes is much easier and less expensive than canning. If you have enough room in your freezer and enjoy making homemade sauce, then freezing tomatoes is the way to go.
The first thing you will need to do is, either harvest or purchase any variety of tomatoes from your garden or local farm stand. Wash them and pat them dry. You can either blanch them and peel their skins first, or freeze them with their skins on. I prefer the later. You will need to core the brown part off the top first. After you are done cutting out the top, squeeze the seeds out and place the tomato in a freezer bag. Continue to follow this procedure till the bag is full and ready to seal. I like to put a bunch of fresh basil in the bag before I seal it, so you don't have to worry about adding basil to your sauce later.
When you are ready to thaw a bag or two, you simply remove them from the freezer and defrost them. You can either use a microwave, or thaw them in a large bowl in your sink. You may have to drain the water that's accumulating in the bowl periodically while they are thawing. Once they are defrosted you can gather up all the ingredients you will need to prepare your favorite pasta sauce with. By freezing tomatoes, you can truly enjoy a garden fresh meal in the middle of January.
Subscribe to:
Posts (Atom)