Friday, August 31, 2007

Drying And Freezing Fresh Basil


Photo By Papa Razzi1. Flickr

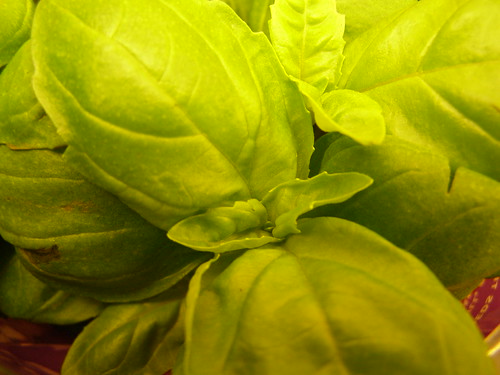
Basil is often used in many of my home cooked meals. This is one herb I would be lost without. Planting an abundance of fresh sweet basil is one of my top priorities while preparing my vegetable garden in the spring. You can use this herb liberally in many recipes, especially in pesto sauces and tomato based dishes. There are a few ways to keep a large supply of basil readily at hand, as the summer fades and as fall begins to roll in. The two methods I've used have been drying and freezing. Either method preserves my basil quite nicely.
Drying Basil is very simple. The first and most common way to dry basil is by harvesting the leaves or sprigs on a sunny morning, when the flavor is at it's peak and it's oil contents is high. Wash your basil if necessary and pat the leaves dry. Tie sprigs together by the bunch and hang them in a dry place away from the light. You can also dry the leaves on a cloth spread over a baking sheet. It will take three weeks for the basil to be completely dried.
For the last four years I've been drying my basil in the microwave. Call me impatient, because I just can't stand waiting out those three weeks. By using a microwave, I have my herbs dried and stored in one day. All you will need to do is follow the first few steps on harvesting. Instead of tying the sprigs together, you would want to gather up a paper towel or paper plate and a microwave safe bowl filled with water. Pull the leaves off of the sprigs and place them on either your paper towel or plate. Place both the basil and the bowl full of water in the microwave. Set your microwave on high for three minutes, If the Herbs look dry, remove them. If they still seem damp, continue to microwave for two additional minutes, then at one minute intervals till they are completely dried and ready to store.

After you are done with the drying process, you should store herbs in clear glass jars away from the light. Mason jars work quite well for storing dried Basil. My personal preference are the larger mason jars, because I can fit more of the herb in the jar, therefore I will have less jars stored in my already crammed spice cabinet.

Last but not least, the fastest and easiest way to store basil is by freezing it. This can be done in a jiffy. Wash and dry the herbs you've collected. Place a bunch of the leaves in a freezer bag. Seal The bag tightly, making sure there is no air caught in the bag. Place the bag in your freezer and your done. When it comes time to use your already frozen basil, you simply take one of the bags out of the freezer. You then break off the amount of basil you will need for that moment and reseal the bag after taking what you need. Place any remaining herbs back in the freezer for future use. It is not necessary to thaw the basil first, just add the desired amount to any of your favorite recipes while it's still frozen frozen.

Any of these storing methods you choose to use, will not only save you of money, but will save you the time of having to run out to the store, on a bone chilling, blustery, winter day, because you ran out of basil and absolutely need it for a recipe your whipping up for dinner guests later that evening.

Tuesday, August 28, 2007

Halloween Witch Drawing

October is one of my favorite months. My birthday falls in this month and so does my favorite holiday, Halloween. Autumn is so pretty as the leaves from the trees are turning all different Hughes of red, orange, brown and yellow. During the month of October, the weather is still warm enough to enjoy the outdoors and admire all of the wonderful changes occurring in nature. There's nothing better than eating a baked butternut squash, or some spiced pumpkin along side of some hearty vegetable stew, accompanied by a tall glass of fresh apple cider from the local apple store on those crisp Autumn evenings, as the days begin to shorten.

October has one of the prettiest full moons out of the whole year, which is called the Harvest Moon. It's been said that farmers use to harvest their crops late into the evening during the Harvest Moon, because the moon was very bright during this time, which made it easier for them to pick their crops well after dark.

Visiting the pumpkin patch to pick out our jack-o-lanterns is a very exciting day for our whole family. We like to make a whole day out of it by going on a hayride, getting our pumpkins, drinking hot mulled apple cider afterwards, picking up winter squash, gourds and apples that same day, then later returning home for a tasty autumn meal.

There are many costumes for children to choose from on Halloween. My daughter has a very hard time deciding what she wants to be. It's so fun getting my children ready to go out trick or treating. Just walking around and seeing everyone in their costumes, running from different houses to see who can get the most candy makes for a great evening. The drawing displayed above is a charcoal I did a month ago. It's called "The Halloween Witch." Hopefully, I will get time to finish two more charcoals I have in mind, so I can complete my "Halloween Witch" series.

Saturday, August 25, 2007

Celestial Oil Painting

Here is an oil painting I did back in 1999. During this time period I was on a celestial kick, so this is what inspired me to create this painting. Even though they are very messy to work with, oil paints are my number one choice of media to work with, out of any other type of media. They go on so smooth and they are easy to rework when you decide you want to change your composition. The colors you can get from using oils can be quite stunning. I do intend on creating some of my butterfly knowledge cards, by using Oil paints for some of my compositions.
Hopefully, I'll be able to find more time to paint during the fall, once my daughter is back in school and my son begins preschool. For now I'm preoccupied harvesting the vegetables and herbs out of my garden and storing them all for the winter months ahead.

My Sunflowers

My sunflowers are in full bloom and they're absolutely beautiful. My husband took the photo displayed on this post from my garden yesterday. It's very important for the other plants in your garden to get pollinated by bees, therefore sunflowers are an ideal choice for this purpose. Bees as well as butterflies swarm around the large yellow flower heads of these plants all day long during the summer months. What a blessing it is for me, to sit and watch nature, with all it's wonders at work, while at the same time reaping the benefits of my garden, along with the healthy meals that come from it.
My sunflowers are planted directly behind my Italian pole beans. I use their large stalks for my beans to vine up. Practicing this method saves me time and money. When planting time rolls around, I plant one row of Italian pole beans, then with the next row close behind, I plant sunflowers until I end up with at least eight altrinating rows.
It's pretty interesting to look at once they are both grown and coexisting happily together through out the summer season. It's also pretty neat walking inbetween the rows of towering mammoths, so I can collect all of the huge beans hanging off of their stalks.


Tuesday, August 21, 2007

West Indian Eggplant And Rice


Photo by Heaven's Gate (John). Flickr
My husband's friend who is a native of St Lucia, located in the Caribbean, cooks up the best West Indian Cuisine I've ever had. On a few occasions, he's come to our home and prepared a few delicious meals from his homeland for all of us to savor and enjoy. One of my favorite dishes is his eggplant over rice. The last time he was over visiting, I watched him make this for us. Since I've been harvesting my eggplant daily, I figured this would be a great time for me to try and make this Caribbean vegetable recipe myself. Obviously, I had to call him once while I was whipping it up, to ask him if I had added all of the accurate spices needed to flavor the eggplant. To my surprise my meal turned out fabulous and both my husband Paul and I, were very happy with the outcome of our West Indian dinner. If you are going to try making this yourself, You will have to figure in the amount of each ingredient by tasting it, rather than measuring everything out with measuring spoons.
Ingredient;
8 medium eggplant chopped and set aside
Olive oil (enough to cover bottom of a sauce pan and more for adding later)
5 large cloves of chopped garlic
2 large white onions, chopped
Cumin
Coriander
Curry powder
Whole Cloves
Turmerac
Saffron
Abodo
Your favorite hot sauce
Salt and pepper to taste
Basmati rice
salt
4 chopped cloves of garlic
1/4 cup of chopped cilantro
black pepper
Wash and chop your eggplant, then set them aside. In a medium or large sauce pan, cover the bottom of the pan with oil. Set your stove to medium high.Heat the oil and add all of the spices to the oil . Keep stirring the oil for about 3 minutes. Add the chopped garlic and onion to the oil and saute for an additional 5 to ten minutes . Avoid burning the garlic. Take your eggplant along with the hot sauce and add everything together. Do not cover your pan. You will need to stir this all in well. At this point you may want to add more olive oil to coat your eggplant. Once your eggplant starts to soften, you will begin mashing it often as it continues to cook. This is the time you should lower your heat to medium, then eventually to medium low. You may want to taste everything at to see if the spices need to be adjusted. You can also add more oil if it seems dry. Continue to cook the eggplant till it is the consistency of paste. This may take up to 45 minutes. The key is to keep stirring and mashing often the whole time it's cooking. You will also want to stir in any browning that you are scraping from the bottom of your pan as you are cooking.
While waiting for the eggplant finish you can prepare the rice by following the directions on the back of the package. When the rice is complete, you can add your chopped garlic, chopped cilantro and salt to taste. Stir it all together well and serve the eggplant over top of your rice.

Friday, August 17, 2007

Freezing Tomatoes For Winter


Photo by 1Bluecanoe. Flickr
During harvesting season I am always gathering up my vine ripened tomatoes, so I can get them ready to freeze for the winter. This method of preserving fresh tomatoes is much easier and less expensive than canning. If you have enough room in your freezer and enjoy making homemade sauce, then freezing tomatoes is the way to go.
The first thing you will need to do is, either harvest or purchase any variety of tomatoes from your garden or local farm stand. Wash them and pat them dry. You can either blanch them and peel their skins first, or freeze them with their skins on. I prefer the later. You will need to core the brown part off the top first. After you are done cutting out the top, squeeze the seeds out and place the tomato in a freezer bag. Continue to follow this procedure till the bag is full and ready to seal. I like to put a bunch of fresh basil in the bag before I seal it, so you don't have to worry about adding basil to your sauce later.
When you are ready to thaw a bag or two, you simply remove them from the freezer and defrost them. You can either use a microwave, or thaw them in a large bowl in your sink. You may have to drain the water that's accumulating in the bowl periodically while they are thawing. Once they are defrosted you can gather up all the ingredients you will need to prepare your favorite pasta sauce with. By freezing tomatoes, you can truly enjoy a garden fresh meal in the middle of January.

Wednesday, August 15, 2007

Garlic Bread


Photo by Gio JL

I'm sure most people enjoy the wonderful flavor of garlic bread, either as an appetizer, or along side of their main meal. You really can't go wrong when making this type of bread. It is very fast and easy to whip up. If you have guests coming over at the last minute and you don't feel like going out of your way making fancy finger foods, then use this quick recipe instead.

Ingredients;

1 loaf of Italian bread cut in half
5 tbs extra virgin olive oil
2 large cloves of minced garlic
1 tbs chopped parsley
1 tbs chopped fresh basil
1/2 medium tomato sliced thin
your favorite grated cheese
shredded mozzarella cheese (optional)
salt and pepper to taste

Pre heat oven to 375. Take the halves of Italian bread and place them on a baking sheet. Spread the olive oil over both halves with a spoon. After spreading the oil, sprinkle minced garlic over the bread. Top with the sliced tomatoes. Add the chopped parsley, basil, salt, pepper and grated cheese to the bread. Place the baking sheet in the oven, on the middle rack. After 8 minutes, add shredded mozzarella cheese to the top if desired and cook for an additional 2 minutes, or till the cheese has melted. Remove the bread from the oven and let it cool for a few minutes. cut, serve and enjoy.

Tuesday, August 14, 2007

Autumn Detox Plan


Photo By Couppas. Flickr
In my most recent issue of "Natural Health Magazine" I found a wonderful three day autumn detox plan. The plan is an all around detox for your body; internally, externally, mentally, physically, spiritually and emotionally. It doesn't seem to be like the many other plans I am familiar with. You don't have to give up solid foods for a few days, but you are on a very simple diet of selected whole organic foods, which are seasonal to the fall. Practicing a diet of eating whole organic foods to fit the season you are presently in is very important to one's health.
Writing your feelings in a daily Journal is also recommended during your detox plan, as it will feel good to clean out your emotional closet, while you detoxify everything else. Foot soaks, using a sea salt and eucalyptus footbath are one of the cleansing rituals, as is yoga and body brushing. herbal detox teas are drunken during the three day plan. Here is one drink which is totally cleansing to your body, and at the same time delicious to sip on. You use 2 teaspoons each of clove, nutmeg, star anise, fennel and two sticks of cinnamon. Simmer in three cups of water over low heat for 15 minutes. Add a half of a cup of apple juice and sprinkle nutmeg on the top of the tea. This is not only a spicy autumn treat, it also stimulates digestion and works as a blood purifier.
As the Autumn Equinox is right around the corner, I am looking forward to practicing this detox plan periodically through out the fall.

ESCAROLE AND CHI CHI BEANS

.
Photo By Carelton500gardener. Flickr
Escarole is a green, which is also known as endive. It is a must for me to plant in my garden every summer. Many Italians eat large amounts of escarole, especially during the growing season. This leafy green was a main staple in our diets, while I was growing up. My mother planted five seed packets of escarole in her garden every summer. Now that I have my own home and garden, I do the same. Escarole is sown in the late spring and can be harvested right up till the end of November in the northeastern united states, if protected by placing dried autumn leaves on top of the plants once the colder evenings roll around to keep them warm. Below I have listed a recipe my mother use to make, that I now make all through the summer and into the late fall.

Ingredients;
5 tbl extra virgin olive oil
1 15 oz can of drained and rinsed garbanzo beans
4 large cloves of garlic
3/4 tsp of course sea salt (or salt to your tasting)
1 large head of escarole
1/4 cup of water
black pepper to taste

Heat the olive oil in a large skillet over medium heat. Once heated, add the salt and garbanzo beans. Cook till they start to brown and their skins get loose, stirring frequently. Add the minced garlic and cook for another two minutes. Add the washed and separated large head of escarole, along with the water and black pepper. cook for an additional fifteen minutes, stirring frequently, then covering the pan with a lid slightly opened. Remove from heat and it's ready to serve. You can serve this as a side dish, or a main dish by tossing it with pasta and adding grated cheese to it. This is a delicious and healthy recipe to try.

Tuesday, August 7, 2007

PAINTING BUTTERFLIES

One of my favorite subjects to paint are butterflies. This particular painting of a monarch on a stargazer lily, is a watercolor done by me, back in 1997. These insects are so colorful and pretty. Each species is completely different from the next, so I never get bored painting them. Someday, I hope to create butterfly knowledge cards. These cards would be used for fun and at the same time guidance for anyone who wishes to use them for this purpose. Many angel knowledge cards are used for the same reasons. Even though I find it hard to make time to paint these days due to my young children, I still intend on painting many more butterfly compositions for the future project I mentioned above.

GARDEN FRESH SALSA


Photo by Renoir Girl. Flickr

Summer is the season when many folks have the opportunity to get their hands on locally grown tomatoes, either from farm stands or their own gardens. This salsa recipe I'm about to share with you is a must to try , with your favorite tortilla chips.

Ingredients;

4 cups chopped tomatoes

1 cup diced onions

1 large chopped jalapeno pepper

1/2 cup chopped cilantro

1 Tbs chopped parsley

1 Tbs garlic

1 1/2 tsp of salt

1/4 tsp black pepper

1 tsp hot sauce

1 tsp Worcestershire sauce

1/2 cup of freshly squeezed lime juice

1 Tbs of extra virgin olive oil

Combine all of the ingredients together and chill for 4 hours or more. Serve and enjoy.

Monday, August 6, 2007

ORGANIC FUNGICIDE REMEDY


Photo By Podchef. Flickr

For the past few summers, I have had to battle with leaf blight infecting my tomato plants. Since organic gardening is very important to me, I make finding an organic solution to my gardening problems one of my number one priorities. I refuse to use anything that may be potentially toxic to the environment or my family. While on my quest to find a homemade fungicide to treat my plants, an easy to make mixture jumped right out at me on an organic gardening sight. I would like to share this recipe with anyone who also practices eco friendly gardening.
All you will need for this all around general fungicide is; a gallon jug full of water with 1 Tbs baking soda, and 2 1/2 Tbs vegetable oil added to it. Shake the jug well. After your done add 1/2 tsp of pure castile soap. pour the mixture into a spray bottle and your ready to go. While spraying your plants, make sure you keep shaking the bottle to keep the mix from separating. Spray both the top and bottom of leaves as well as the soil around the infected plant. Repeat every 7 days.
This baking soda spray can be used to treat anthrocnose, early tomato blight, leaf blight and spots, as well as powdery mildew.